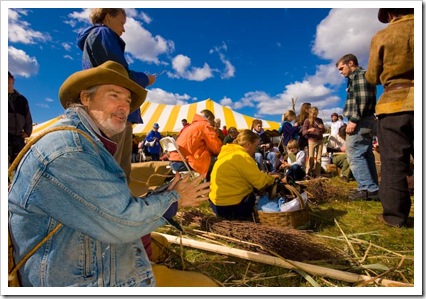
I’ve had some requests from viewers asking if I could explain how I made the final image. Let me first assure you it’s not anything fancy…it’s just knowing where to use fill light, and how much to use.
Let’s jump right in shall we?
The lighting method I used to get the color of the sky, along with the clouds and the rest of the colors is and still manage to light the subject nicely is generally known as the strobist method, a term made popular by David Hobby and his popular photo blog Strobist (www.strobist.com)
First I started with a reference picture, that is, I took a picture (using the Manual mode on my camera) and specifically exposed the image so that the sky came out blue, which basically means the clouds will come out white naturally. The original reference picture exposure settings may take some tweaking…in my case I ended up shooting the reference image at 1/160 second, f/13, ISO 100. Here is the resulting reference shot:
Notice the sky is a nice blue, the clouds look pretty good, and the color of the tent in the background looks pretty good too. The reason is simple: all these elements in the photo are being exposed by the same source, (the Sun) so they are all being exposed the same. The result is good color.
|
But our subject is very dark since his back is facing the Sun, his face in the shadows. Now for the fun part!
| Ahh…now this is much better…but how did we get here? Easy...we took our reference picture, and added the missing piece: fill light. In this case, balanced fill light from a hand-held flash. I used a wireless trigger (Cactus V2s, about $40 from Gadget Infinity) and adjusted the power of the flash ( a Vivitar 285HV) until it provided just enough light. Too much light and we set the subject on fire (figuratively speaking ) and too little light and the colors of subject go dark or worse..dull and draby, like a cold New England winter day. I hope this helps….now go out and try it!
|


